 En
En
 De
De Fr
Fr Ru
Ru Es
Es Pt
Pt It
It Ar
Ar Se
Se Nl
Nl Jp
Jp Tw
Tw Gr
Gr Th
Th Fi
Fi Ko
Ko Pl
Pl Cn
Cn Tr
Tr No
No Dk
Dk Il
Il My
My Hu
Hu Hi
Hi
How do i connect a 4-port switch?
To connect a 4-port switch, first, ensure that you have the necessary cables and power supply. Connect one end of an Ethernet cable to the LAN port of your modem or router. Then, connect the other end of the Ethernet cable to the uplink port (sometimes labeled as "Internet" or "WAN") on the switch. Next, connect one end of an Ethernet cable to any of the available ports on the switch. Finally, connect the other end of the Ethernet cable to the device you want to connect to the network. Repeat this process for up to three additional devices, using the remaining ports on the switch. Once all the connections are made, power on the switch and the connected devices, and they should be able to communicate on the network.
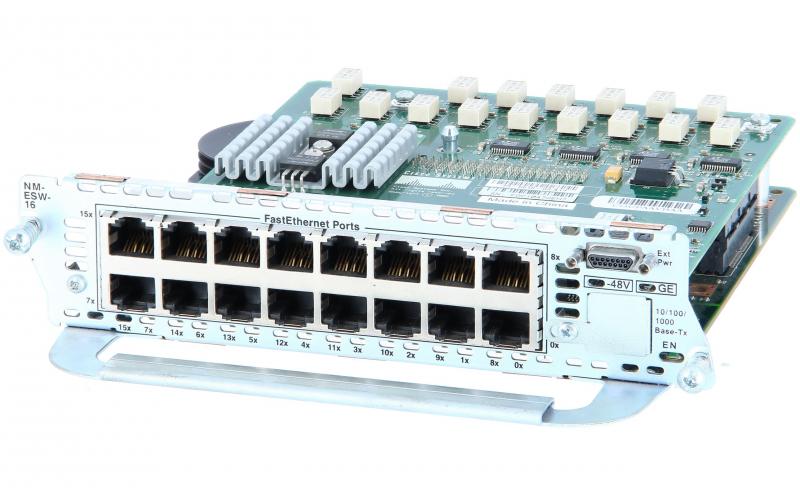
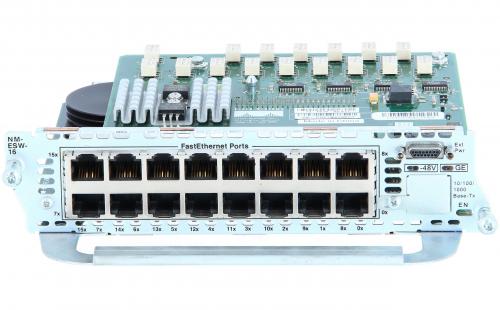
Ethernet cable connections for a 4-port switch
To connect a 4-port switch, you will need Ethernet cable connections. Here's a step-by-step guide to help you set it up:
1. Gather the necessary equipment: You will need a 4-port switch, Ethernet cables, and devices you want to connect to the switch (e.g., computers, printers, gaming consoles).
2. Position the switch: Find a suitable location for the switch where it can be easily accessible and has proper ventilation to prevent overheating.
3. Connect the switch to the power source: Plug in the power adapter of the switch into an electrical outlet.
4. Connect the switch to your modem or router: Take an Ethernet cable and connect one end to an available Ethernet port on your modem or router. Then, connect the other end to the uplink port on the switch. This will provide internet connectivity to the devices connected to the switch.
5. Connect devices to the switch: Take additional Ethernet cables and connect one end to the Ethernet ports on your devices (e.g., computers, printers). Connect the other end of the cables to the available ports on the switch. Each device should have its own dedicated port.
6. Test the connection: Power on all the devices connected to the switch and check if they are able to access the internet or communicate with each other. If any device is not working, ensure that the Ethernet cables are securely connected and try restarting the devices.
It's worth noting that when setting up a network, it's becoming increasingly common to use wireless connections instead of relying solely on wired connections. However, a 4-port switch can still be useful in situations where a wired connection is preferred or necessary, such as for devices that require a more stable and faster connection.

Configuring network settings for a 4-port switch
To connect a 4-port switch to your network, you will need a few basic steps. Here is a guide on how to do it:
1. Gather the necessary equipment: You will need the 4-port switch itself, Ethernet cables, and a power adapter for the switch.
2. Choose a suitable location: Find a central location where you can place the switch. It should be near the devices you want to connect and have access to power outlets.
3. Power off all devices: Before connecting anything, make sure all devices that will be connected to the switch are powered off.
4. Connect the Ethernet cables: Take one end of an Ethernet cable and connect it to the Ethernet port on your modem or router. Then, connect the other end to the uplink port (sometimes labeled as "WAN" or "Internet") on the switch. Next, take another Ethernet cable and connect one end to any of the remaining ports on the modem or router, and the other end to any of the available ports on the switch. Repeat this step for each device you want to connect.
5. Power on the switch and devices: Plug in the power adapter of the switch and turn it on. Then, power on all the devices connected to the switch.
6. Test the connection: Once everything is powered on, check the network connectivity on each device. Ensure that they are able to access the internet or communicate with each other as desired.
Configuring network settings for a 4-port switch may not be necessary in most cases, as switches are typically plug-and-play devices. However, if you have specific requirements or want to optimize your network, you can access the switch's management interface through a web browser. From there, you can configure settings such as VLANs, Quality of Service (QoS), or port mirroring, depending on the capabilities of your switch.
It's important to note that the latest point of view regarding network connectivity emphasizes the importance of network security. When setting up a 4-port switch or any network device, ensure that you have implemented proper security measures such as using strong passwords, enabling encryption protocols, and keeping the firmware up to date to protect against potential vulnerabilities.
Troubleshooting common issues with a 4-port switch
To connect a 4-port switch, you will need a few steps to ensure proper setup. Here's a guide to help you through the process:
1. Gather your equipment: You will need the 4-port switch, Ethernet cables, and the devices you want to connect (e.g., computers, gaming consoles, printers).
2. Power off all devices: Before connecting anything, it's always a good idea to turn off all devices, including your modem and router.
3. Connect the switch to the router: Take an Ethernet cable and connect one end to an available LAN port on your router. Connect the other end to the uplink port (sometimes labeled as "Uplink" or "WAN") on the switch.
4. Connect devices to the switch: Take additional Ethernet cables and connect one end to the LAN ports on the switch. Connect the other end to the Ethernet ports on your devices.
5. Power on the devices: Start by turning on your modem, then your router, and finally, your devices. Give them a few moments to establish connections.
6. Test the connections: Once everything is powered on, check if the devices connected to the switch can access the internet or communicate with each other. If any issues arise, continue with troubleshooting steps.
Troubleshooting common issues with a 4-port switch:
1. Check cable connections: Ensure all cables are securely plugged into the switch and devices. Loose connections can cause intermittent connectivity problems.
2. Restart devices: Power cycle your modem, router, and switch by turning them off, waiting for a few seconds, and turning them back on. This can resolve temporary glitches.
3. Update firmware: Visit the manufacturer's website and check if there are any firmware updates available for your switch. Updating the firmware can fix known bugs and improve performance.
4. Reset the switch: If all else fails, you can try resetting the switch to its factory defaults. Look for a small reset button on the switch and press it with a paperclip or similar tool for about 10 seconds. Note that this will erase any custom configurations you may have made.
Remember, technology is constantly evolving, so it's always a good idea to consult the user manual or the manufacturer's website for the most up-to-date instructions and troubleshooting tips specific to your 4-port switch model.
Expanding network capacity with a 4-port switch
To connect a 4-port switch, you will need a few simple steps. First, ensure that you have all the necessary equipment, including the 4-port switch, Ethernet cables, and a power source.
1. Choose a suitable location: Select a central location for the switch, preferably near the devices you want to connect. This will help ensure optimal network performance.
2. Power up the switch: Connect the power adapter to the switch and plug it into a power outlet. Make sure the switch is receiving power by checking for the appropriate LED lights.
3. Connect devices: Take an Ethernet cable and connect one end to the Ethernet port of the device you want to connect (e.g., a computer or a printer). Then, connect the other end of the cable to one of the available ports on the switch. Repeat this step for each device you wish to connect.
4. Test the connection: Once all devices are connected, check if they can communicate with each other and access the network. You can do this by transferring files or accessing the internet from each device.
Expanding network capacity with a 4-port switch can be a cost-effective solution for small networks or home setups. It allows you to connect multiple devices to a single network connection, eliminating the need for additional Ethernet ports on your router or modem. Additionally, using a switch can help improve network performance by reducing congestion and increasing bandwidth availability.
Remember to consider the latest point of view when setting up your network. With the advent of wireless technology and the increasing number of devices that connect wirelessly, you may also want to explore options like Wi-Fi extenders or mesh networks to further expand your network capacity.


