 En
En
 De
De Fr
Fr Ru
Ru Es
Es Pt
Pt It
It Ar
Ar Se
Se Nl
Nl Jp
Jp Tw
Tw Gr
Gr Th
Th Fi
Fi Ko
Ko Pl
Pl Cn
Cn Tr
Tr No
No Dk
Dk Il
Il My
My Hu
Hu Hi
Hi
How to install cwdm?
To install Coarse Wavelength Division Multiplexing (CWDM), follow these general steps:
1. Determine the CWDM system requirements: Identify the number of wavelengths needed, the specific wavelengths, and the required distance between sites.
2. Prepare the fiber optic network: Ensure that the fiber optic cables are clean, undamaged, and properly labeled.
3. Connect the CWDM modules: Install the CWDM modules at each end of the fiber optic link, making sure to align the wavelengths correctly.
4. Connect the fiber optic cables: Connect the corresponding fibers from each CWDM module, ensuring a secure and proper connection.
5. Test the CWDM system: Use an optical power meter or other testing equipment to measure the signal strength and verify the proper functioning of the CWDM system.
6. Secure and manage the installation: Properly secure the CWDM modules and cables, and consider implementing a management system to monitor and control the CWDM network.
Please note that these steps provide a general overview, and the specific installation process may vary depending on the CWDM system and equipment being used. It is recommended to consult the manufacturer's instructions and guidelines for detailed installation procedures.
Understanding CWDM Technology
To install CWDM (Coarse Wavelength Division Multiplexing) technology, follow the steps below:
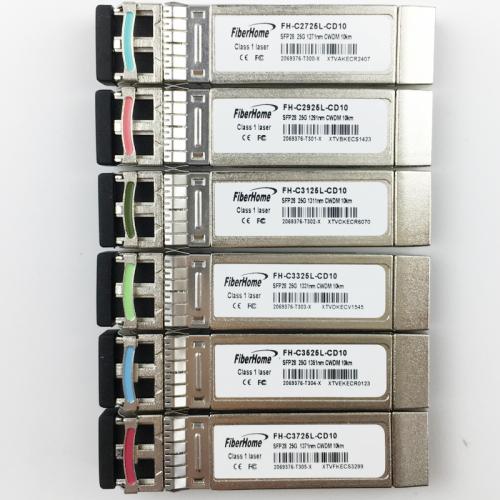
1. Plan the network: Determine the number of wavelengths needed for your network and the distances they will cover. CWDM typically supports up to 18 wavelengths, each operating at a specific wavelength, such as 1270nm, 1290nm, 1310nm, and so on.
2. Select the CWDM equipment: Choose the appropriate CWDM multiplexer/demultiplexer modules, transceivers, and optical amplifiers based on your network requirements. These components will enable you to combine multiple wavelengths onto a single fiber and separate them at the other end.
3. Prepare the fiber optic cables: Connect the CWDM modules to the existing fiber optic cables. Ensure that the cables are clean and free from any damage. Use fiber optic connectors to make the connections, and make sure they are securely fastened.
4. Install the CWDM modules: Mount the CWDM multiplexer and demultiplexer modules at the appropriate locations in your network. These modules can be installed in a rack or a wall-mounted enclosure. Follow the manufacturer's instructions for installation and ensure proper alignment of the modules.
5. Connect the transceivers: Install the CWDM transceivers on the network devices such as switches, routers, or servers. These transceivers will transmit and receive data at specific wavelengths assigned to them.
6. Test the network: Once the installation is complete, perform thorough testing to ensure that the CWDM system is functioning correctly. Use an optical power meter or an OTDR (Optical Time-Domain Reflectometer) to measure the signal strength and verify the integrity of the connections.
It is important to note that CWDM technology continues to evolve, and the latest advancements include higher channel counts, increased transmission distances, and improved signal quality. Therefore, it is recommended to consult with experts or refer to the latest documentation provided by the CWDM equipment manufacturers for the most up-to-date installation procedures and best practices.
Selecting and Preparing the CWDM Components
To install CWDM (Coarse Wavelength Division Multiplexing), it is essential to carefully select and prepare the CWDM components. Here are the steps to follow:
1. Determine the number of wavelengths required: Assess the network's capacity needs and identify the number of wavelengths needed for transmission. CWDM typically supports up to 18 wavelengths, each operating on a different wavelength channel.
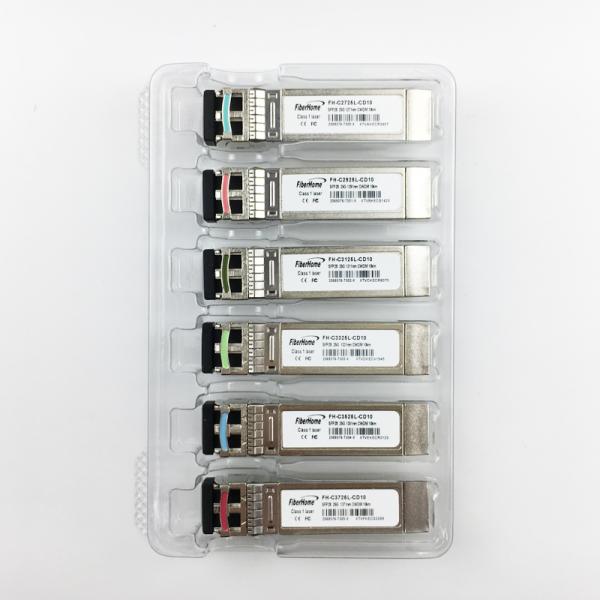
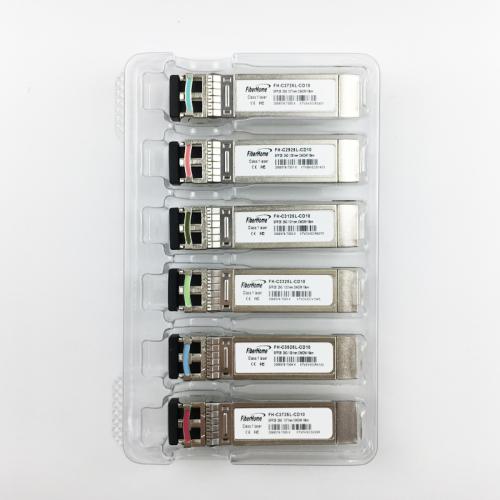
2. Select the CWDM modules: Choose the appropriate CWDM modules based on the required wavelengths. These modules are typically small form-factor pluggable (SFP) or small form-factor pluggable plus (SFP+). Ensure compatibility with the network equipment.
3. Prepare the fiber optic cables: Clean and inspect the fiber optic cables to ensure they are free from any dirt or damage. Cut the cables to the desired length, leaving some extra length for splicing and connections.
4. Install the CWDM modules: Insert the CWDM modules into the appropriate slots on the network equipment, such as switches or routers. Ensure proper alignment and secure the modules in place.
5. Connect the fiber optic cables: Connect the fiber optic cables to the CWDM modules using appropriate connectors, such as LC or SC connectors. Ensure proper alignment and secure the connections.
6. Test the CWDM installation: Use an optical power meter or an optical time-domain reflectometer (OTDR) to test the CWDM installation. Check the signal strength and quality of each wavelength channel to ensure proper functioning.
7. Monitor and maintain: Regularly monitor the CWDM system to ensure optimal performance. Perform periodic checks and maintenance to prevent any issues or degradation in signal quality.
It is important to note that the installation process may vary depending on the specific CWDM components and network setup. Therefore, it is recommended to refer to the manufacturer's guidelines and specifications for detailed installation instructions.
Installing the CWDM System
Installing a CWDM (Coarse Wavelength Division Multiplexing) system involves several steps to ensure proper installation and functionality. Here is a guide on how to install CWDM:
1. Planning: Before installation, it is crucial to plan the CWDM system's layout, including the number of channels required and the distances between the nodes. This step helps determine the required components and fiber optic cables.
2. Equipment and Components: Acquire the necessary CWDM components, including CWDM multiplexers, demultiplexers, transceivers, and fiber optic cables. Ensure that the equipment is compatible with the network infrastructure and supports the desired wavelengths.
3. Fiber Preparation: Prepare the fiber optic cables by cleaning and inspecting them for any damage or dirt. Cut the cables to the required lengths and strip the protective coating from the ends.
4. Mounting: Install the CWDM multiplexers and demultiplexers in appropriate locations, such as equipment racks or cabinets. Ensure that they are securely mounted and have proper ventilation for optimal performance.
5. Fiber Connections: Connect the fiber optic cables to the CWDM multiplexers and demultiplexers using appropriate connectors, such as LC or SC connectors. Make sure to follow the correct fiber color coding scheme to maintain consistency.
6. Power Supply: Provide power to the CWDM system components, including transceivers and multiplexers. Ensure that the power supply is stable and meets the manufacturer's specifications.
7. Testing and Verification: After installation, perform thorough testing and verification to ensure that the CWDM system is functioning correctly. Use appropriate testing equipment to measure the optical power levels and verify the transmission quality.
It is essential to consult the manufacturer's installation guide or seek professional assistance for specific installation instructions and the latest best practices. Additionally, staying updated with the latest industry standards and advancements can help ensure a successful CWDM installation.
Testing and Troubleshooting CWDM Installation
To install CWDM (Coarse Wavelength Division Multiplexing), you need to follow a series of steps to ensure a successful installation. Here is a general guide on how to install CWDM:
1. Plan your network: Determine the number of channels you require and the wavelengths you want to use. This will help you select the appropriate CWDM modules and components.
2. Prepare the fiber infrastructure: Ensure that the fiber cables are clean and free from any damage. Verify that the connectors are correctly terminated and polished.
3. Mount the CWDM modules: Install the CWDM modules in the appropriate rack or chassis. Make sure to follow the manufacturer's instructions for proper installation.
4. Connect the fiber cables: Connect the fiber cables to the CWDM modules using the correct connectors. Ensure that the connectors are securely mated and properly aligned.
5. Test the CWDM installation: Use an optical power meter and an optical spectrum analyzer to measure the power levels and wavelengths of the CWDM channels. This will help you verify that the installation is successful and that the system is operating within the desired specifications.
6. Troubleshooting: If you encounter any issues during the installation or testing process, refer to the manufacturer's documentation for troubleshooting steps. You may need to check the connections, clean the fiber cables, or replace any faulty components.
It is important to note that CWDM technology is constantly evolving, and the latest point of view may include advancements such as higher channel counts, increased transmission speeds, and improved reliability. Therefore, it is recommended to consult the manufacturer's documentation and stay updated with the latest industry standards and best practices for CWDM installation.


