 En
En
 De
De Fr
Fr Ru
Ru Es
Es Pt
Pt It
It Ar
Ar Se
Se Nl
Nl Jp
Jp Tw
Tw Gr
Gr Th
Th Fi
Fi Ko
Ko Pl
Pl Cn
Cn Tr
Tr No
No Dk
Dk Il
Il My
My Hu
Hu Hi
Hi
How to install pcie ethernet card?
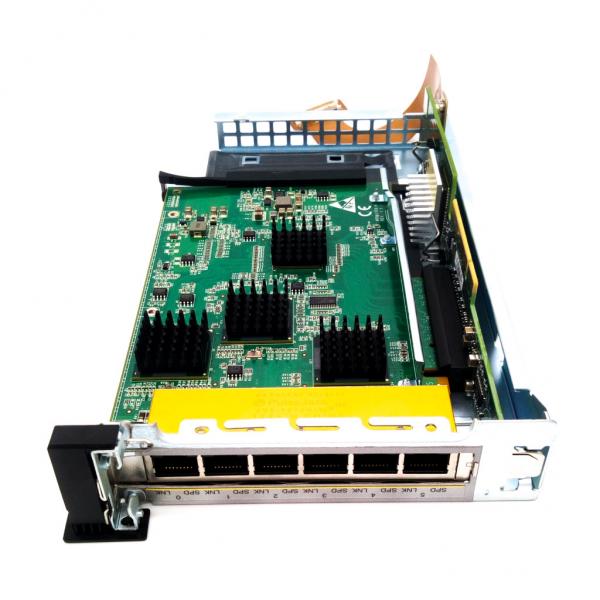
To install a PCIe Ethernet card, follow these steps:
1. Turn off your computer and unplug it from the power source.
2. Open the computer case by removing the screws or latches on the side panel.
3. Locate an available PCIe slot on the motherboard. It will be longer than other slots and usually positioned towards the bottom.
4. Remove the metal cover from the corresponding slot on the back of the computer case.
5. Align the Ethernet card's connector with the PCIe slot and gently press it into place. Make sure it is fully inserted.
6. Secure the card by screwing it into place using the screw that was removed from the metal cover.
7. Close the computer case and fasten the screws or latches to secure it.
8. Connect the Ethernet cable to the Ethernet port on the card.
9. Plug in your computer and turn it on.
10. Install any necessary drivers or software that came with the Ethernet card by following the manufacturer's instructions.
Once the installation is complete, your computer should recognize the new Ethernet card, and you will be able to connect to the network using the card's Ethernet port.
Physical Installation of PCIe Ethernet Card
Physical Installation of PCIe Ethernet Card:
To install a PCIe Ethernet card in your computer, follow these steps:
1. Turn off your computer and unplug it from the power source. This is important to ensure your safety and prevent any damage to the components.
2. Open the computer case by removing the screws or latches on the side panel. Refer to your computer's manual for specific instructions on how to open the case.
3. Locate an available PCIe slot on your motherboard. PCIe slots are usually longer and have a latch at the end. Make sure the slot you choose is compatible with your Ethernet card (e.g., PCIe x1, x4, x8, or x16).
4. Remove the metal bracket on the back of the case that corresponds to the PCIe slot you have chosen. This will allow the Ethernet card to fit properly.
5. Carefully align the Ethernet card with the PCIe slot and gently insert it into the slot. Apply even pressure until the card is fully seated in the slot.
6. Secure the Ethernet card by screwing it into place using the screw that came with the card. Make sure it is firmly attached to avoid any loose connections.
7. Close the computer case and secure it with the screws or latches.
8. Connect the Ethernet cable to the Ethernet port on the card.
9. Plug in your computer and turn it on. The operating system should automatically detect the new Ethernet card and install the necessary drivers. If not, you may need to install the drivers manually using the installation disc or by downloading them from the manufacturer's website.
10. Test the Ethernet connection to ensure it is working properly. You can do this by connecting to the internet or accessing a local network.
It's important to note that the latest point of view may vary depending on the specific Ethernet card and computer system. Therefore, it's always recommended to refer to the manufacturer's instructions or consult online resources for any specific requirements or updates.

Network Configuration for PCIe Ethernet Card
To install a PCIe Ethernet card, follow these steps:
1. Turn off your computer and unplug it from the power source.
2. Open the computer case by removing the screws on the side panel.
3. Locate an available PCIe slot on the motherboard. PCIe slots are usually longer than other expansion slots and are typically located near the back of the motherboard.
4. Remove the metal bracket covering the PCIe slot by unscrewing the screw holding it in place.
5. Carefully align the Ethernet card with the PCIe slot and insert it firmly into the slot. Make sure the card is properly seated.
6. Secure the Ethernet card to the case by screwing the metal bracket back in place.
7. Close the computer case and screw the side panel back on.
8. Connect the Ethernet cable to the Ethernet port on the card.
9. Plug your computer back into the power source and turn it on.
10. Install the drivers for the Ethernet card. You can usually find the drivers on the manufacturer's website or on a CD that came with the card. Follow the installation instructions provided by the manufacturer.
Once the drivers are installed, your computer should recognize the Ethernet card, and you should be able to configure your network settings as needed.
In terms of network configuration for the PCIe Ethernet card, it will largely depend on your specific requirements and network setup. You may need to configure the IP address, subnet mask, default gateway, and DNS settings to ensure proper connectivity. You can do this by accessing the network settings in your operating system and entering the appropriate values. It is recommended to consult the user manual or the manufacturer's website for specific instructions on configuring the card for your network environment.
Additionally, it is worth mentioning that newer PCIe Ethernet cards may support advanced features such as 10GbE (10 Gigabit Ethernet) or even faster speeds, which can provide faster and more reliable network connections. These cards may also support features like VLAN tagging or Jumbo Frames, which can enhance network performance in certain scenarios. It is important to check the specifications and capabilities of your specific PCIe Ethernet card to take advantage of any advanced features it may offer.


